Generating Code Based on Protobuf+JSON+ Custom Templates
Overview
By using custom templates and Protobuf, you can generate various custom scene codes. You only need to provide two main parameters: the proto file and the template directory path. It supports generating code in batches by specifying multiple proto files.
Applicable scenarios:
- gRPC service code.
- Test cases for gRPC server and client.
- http service api, router, service, etc. code.
Prerequisites
Environment Requirements:
sponge is installed.
Prepare the proto file, for example, the content of the 'user. pro' file is as follows:
syntax = "proto3";

package api.user.v1;

import "google/api/annotations.proto";
import "validate/validate.proto";

option go_package = "user/api/user/v1;v1";

service User {
    // Login
    rpc Login(LoginRequest) returns (LoginReply) {
        option (google.api.http) = {
        post: "/api/v1/auth/login"
        body: "*"
        };
    }
}

message LoginRequest {
    string email = 1 [(validate.rules).string.email = true];
    string password = 2 [(validate.rules).string.min_len = 6];
}

message LoginReply {
    uint64 id = 1;
    string token = 2;
}
Tips
To quickly get familiar with the basic syntax rules of Protobuf, please refer to the Protobuf documentation.
Fixed and Custom Fields
The code generation feature supports two types of fields:
- Fixed fields
- Custom fields
Both fixed and custom fields correspond to placeholders in the template code.
Fixed fields: These are fields automatically parsed from the protobuf file and cannot be changed. An example of fixed fields corresponding to user.proto is as follows:
{
    "Proto": {
        "FileDir": "api/user/v1",
        "FileName": "user.proto",
        "FileNamePrefix": "user",
        "FileNamePrefixCamel": "User",
        "GoPackage": "\"user/api/user/v1\"",
        "GoPkgName": "userV1",
        "ImportPkgMap": {
            "userV1": "userV1 \"user/api/user/v1\""
        },
        "FieldImportPkgMap": {
            "userV1": "userV1 \"user/api/user/v1\""
        },
        "Package": "api.user.v1",
        "Services": [
            {
                "GoPkgName": "userV1",
                "Methods": [
                    {
                        "Comment": "// Login",
                        "HTTPRequestBody": "",
                        "HTTPRequestMethod": "POST",
                        "HTTPRouter": "/api/v1/auth/login",
                        "InvokeType": "unary_call",
                        "IsIgnoreGinBind": false,
                        "IsPassGinContext": false,
                        "MethodName": "Login",
                        "ReplyFields": [
                            {
                                "Comment": "",
                                "FieldType": "uint64",
                                "GoType": "uint64",
                                "GoTypeCrossPkg": "uint64",
                                "ImportPkgName": "",
                                "ImportPkgPath": "",
                                "Name": "Id"
                            }
                        ],
                        "ReplyImportPkgName": "userV1",
                        "ReplyName": "LoginReply",
                        "RequestFields": [
                            {
                                "Comment": "",
                                "FieldType": "string",
                                "GoType": "string",
                                "GoTypeCrossPkg": "string",
                                "ImportPkgName": "",
                                "ImportPkgPath": "",
                                "Name": "Email"
                            }
                        ],
                        "RequestImportPkgName": "userV1",
                        "RequestName": "LoginRequest"
                    }
                ],
                "ServiceName": "User",
                "ServiceNameCamel": "User",
                "ServiceNameCamelFCL": "user",
                "ServiceNamePluralCamel": "Users",
                "ServiceNamePluralCamelFCL": "users"
            }
        ]
    }
}
Custom fields: Custom fields are optional. They are defined in a JSON file only when needed by the template. For example, create a file named fields.json with the following content:
{
 "ModuleName": "user",
 "PackageName": "service",
 "ServerName": "grpc",
 "Port": 8282
}
Warning
In custom fields, avoid using Proto as a field name, as it conflicts with the fixed field name.
Creating Custom Template Code
The template code is the core of code generation, implemented based on Go's text/template library. Therefore, it is recommended to first become familiar with its basic syntax rules. The syntax rules are simple and can be learned in a few minutes. Click to view the chapter: Go text/template Basic Syntax Rules.
Template filenames should use variable forms (e.g., {{.Proto.FileNamePrefix}}.go.tmpl) to avoid naming conflicts when processing multiple proto files. The following is an example of a gRPC service template:
package service

import (
 "context"
 "google.golang.org/grpc"
 {{- range $pkgName, $pkgPath := .Proto.ImportPkgMap }}
 {{$pkgPath}}
 {{- end }}
)

// Register gRPC service
func Register{{.Proto.FileNamePrefixCamel}}Server(server *grpc.Server) {
 {{- range .Proto.Services }}
 {{.GoPkgName}}.Register{{.ServiceNameCamel}}Server(server, New{{.ServiceNameCamel}}Server())
 {{- end }}
}

{{- range .Proto.Services }}
type {{.ServiceNameCamelFCL}} struct {
 {{.GoPkgName}}.Unimplemented{{.ServiceNameCamel}}Server
}

// Create service instance
func New{{.ServiceNameCamel}}Server() {{.GoPkgName}}.{{.ServiceNameCamel}}Server {
 return &{{.ServiceNameCamelFCL}}{}
}

{{- range .Methods }}
// {{.Comment}}
func (s *{{.ServiceNameCamelFCL}}) {{.MethodName}}(ctx context.Context, req *{{.RequestImportPkgName}}.{{.RequestName}}) (*{{.ReplyImportPkgName}}.{{.ReplyName}}, error) {
 return &{{.ReplyImportPkgName}}.{{.ReplyName}}{}, nil
}
{{- end }}
{{- end }}
Store the template files in a directory (e.g., template), which can contain multiple template files and subdirectories.
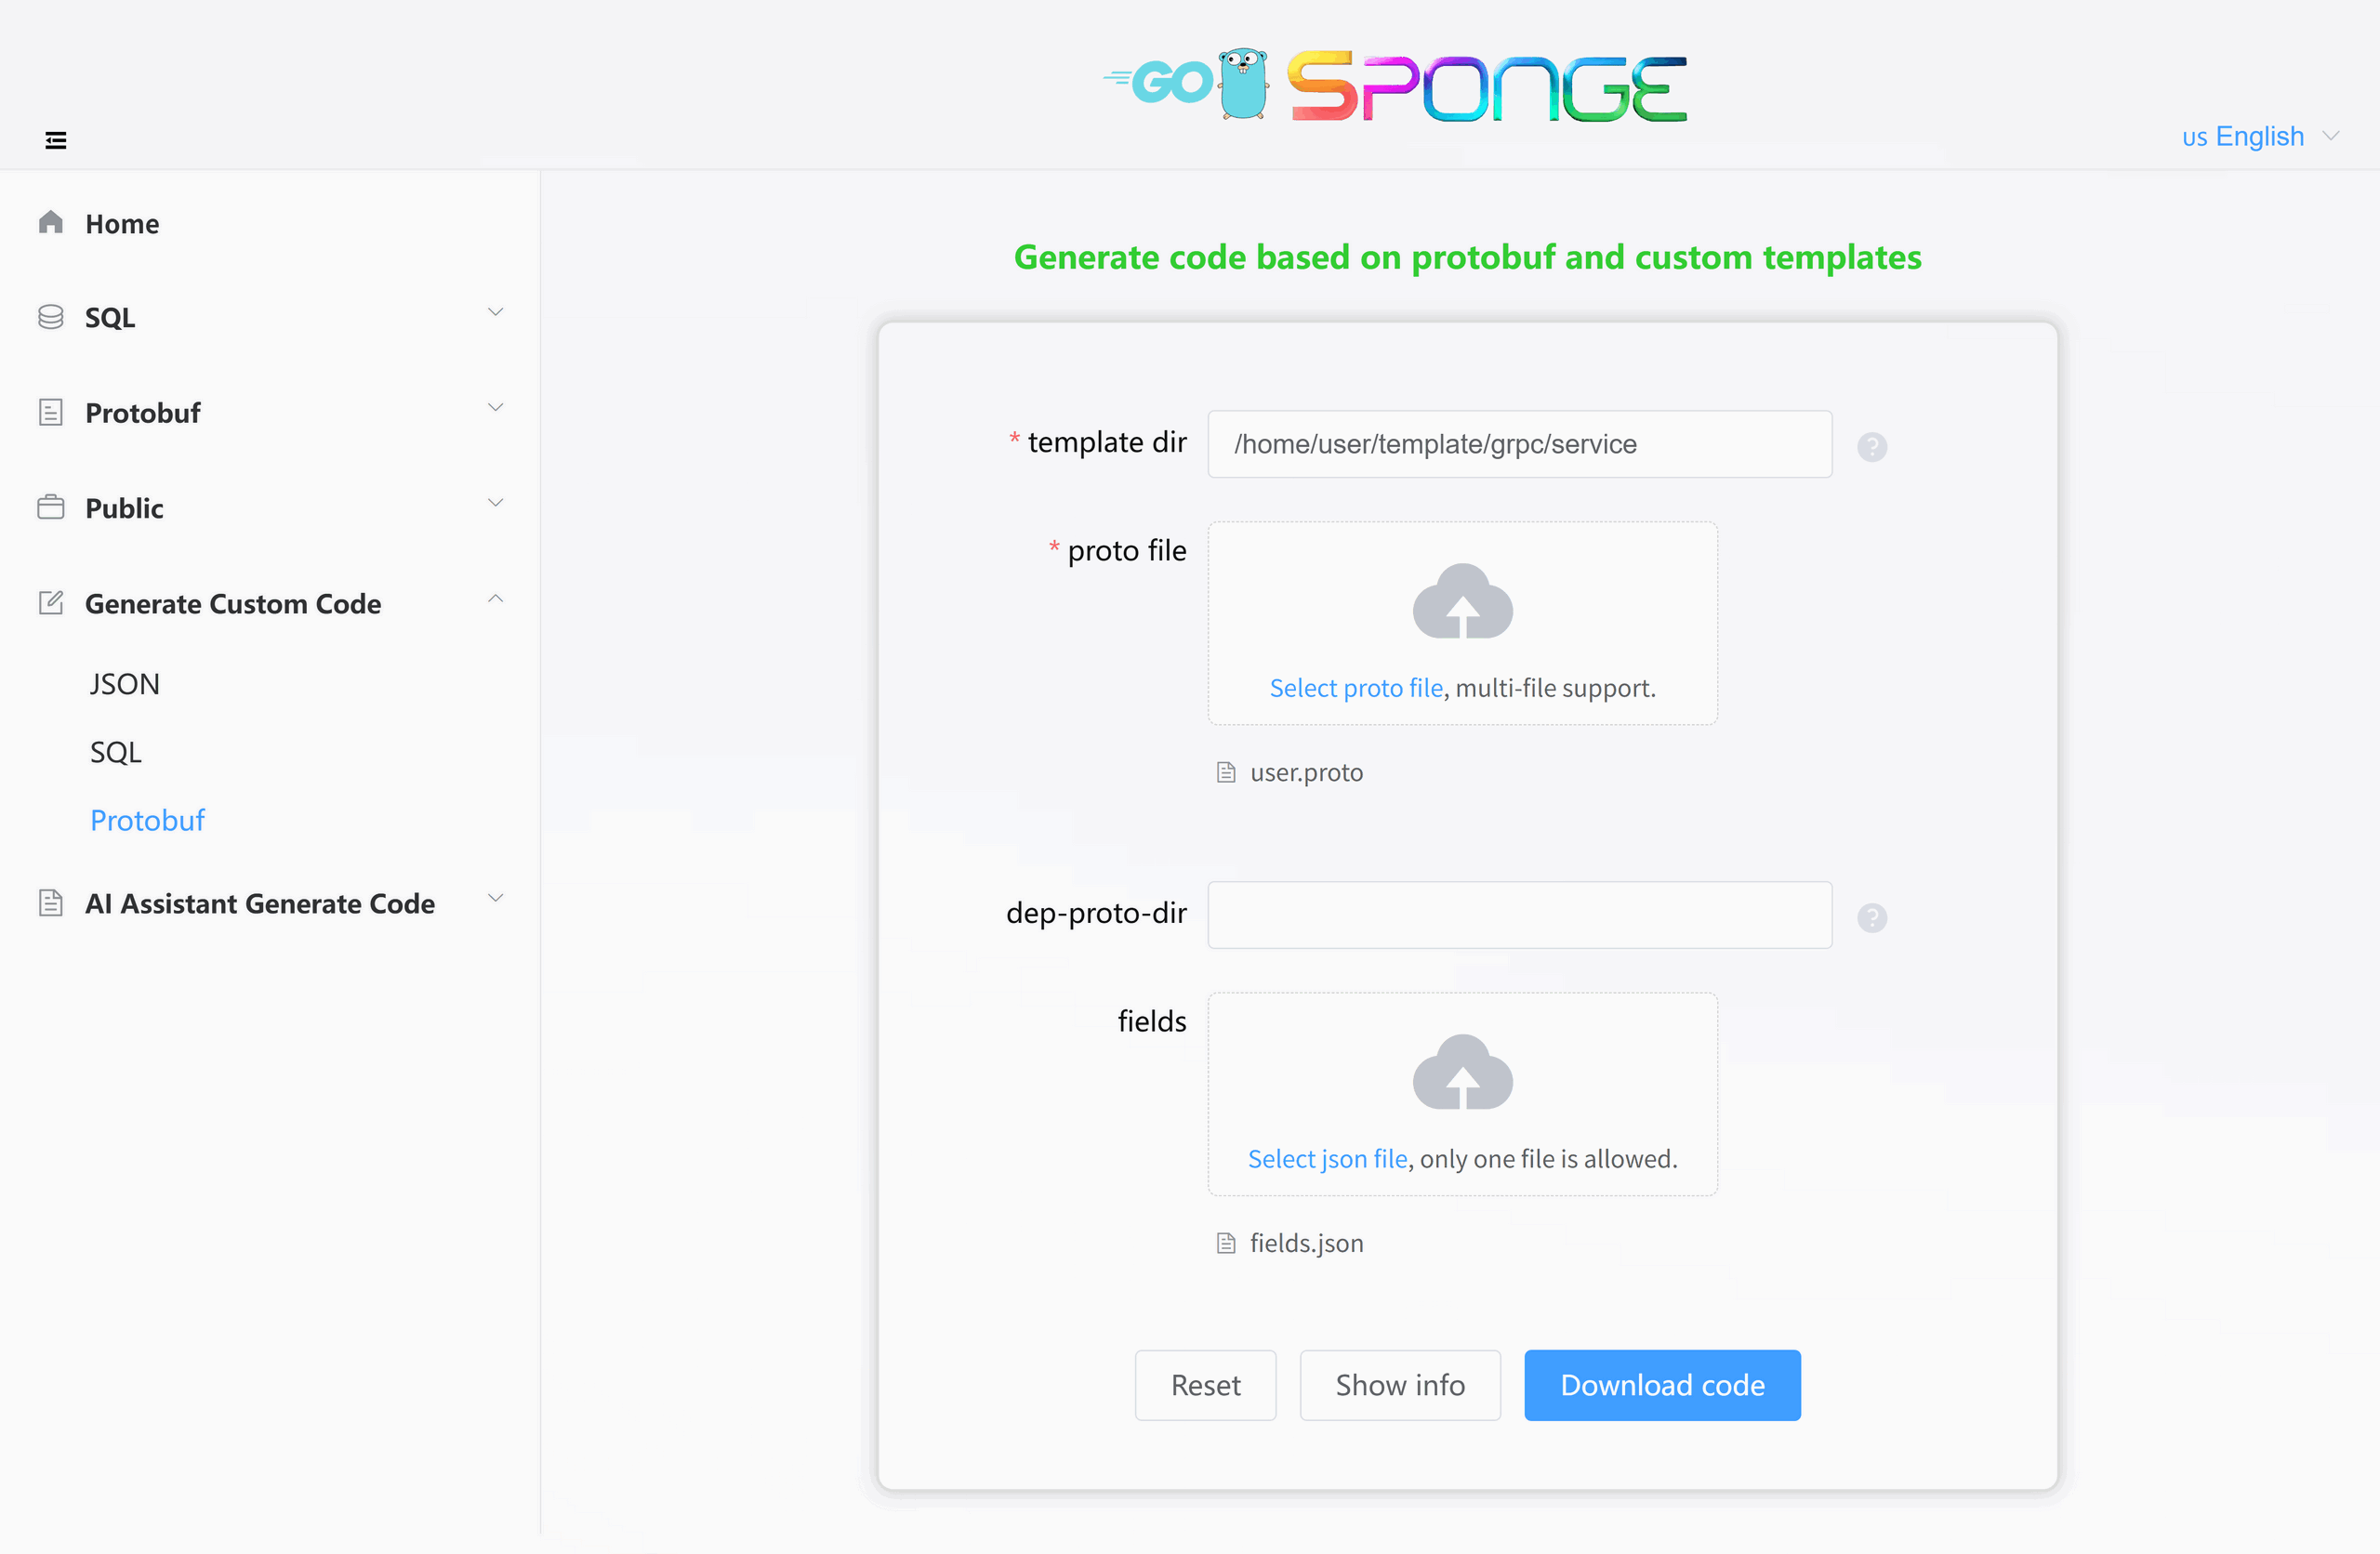
Generating Code
Execute the command sponge run in the terminal to enter the code generation UI interface. The specific steps are as follows:
- Enter the interface: Click [Generate Custom Code] → [Protobuf] in the left menu.
- Fill in parameters (hover the mouse over the question mark
?next to the parameter to view the parameter description):- Template directory path: e.g.,
/home/user/template/grpc/service - Proto file path: e.g.,
user.proto - Dependent proto file directory (optional): If you only depend on proto files from sponge/third_party, there is no need to declare the dependency. In all other cases, the dependency directories must be explicitly specified.
- Custom fields JSON file (optional): e.g.,
fields.json.
- Template directory path: e.g.,
- Click the Download Code button to generate the code, as shown in the figure below:
Equivalent Command
sponge template protobuf --tpl-dir=/home/user/template/grpc/service --proto-file=user.proto --fields=fields.jsonTips
Click the View Template Information button to view field information, which corresponds to the placeholders in the template and makes writing template code easier.